BVRecommendations
Product Recommendations is currently in BETA! If you would like to participate in the Beta Pilot Program, please contact Mobile Development at Bazaarvoice
This page describes how you configure the BVRecommenationsManager in your iOS project so you can begin to use the funcionality of the BVRecommendations SDK module.
NOTE: Make sure you have your API Key and Client ID before configuring the managers!
Also, you can check out the product recommendations example app under /Example/BVProductRecsExample!
-
Add the following line to your
Podfile, if not already there:pod 'BVSDK' pod 'BVSDK/BVRecommendations'
TIP: If using Swift, make sure to add the
use_frameworks!line to your Podfile! This alleviates the need to add an Objective-C bridging header. If you are using an Objective-C briding hearder in your Swift project please refer to Apple's documentation on the process.
-
Install the BVSDK with:
$ pod install
Include the following headers in your project:
#include <BVSDK/BVSDK.h>
#include <BVSDK/BVRecommendations.h>
Then add the following to your AppDelegate's didFinishLaunchingWithOptions function.
[BVSDKManager sharedManager].clientId = @"YOUR_CLIENT_ID";
[BVSDKManager sharedManager].apiKeyShopperAdvertising = @"YOUR_API_KEY";
[BVSDKManager sharedManager].staging = YES; // set to NO for production!Note: this is not necessary for Swift project that include the SDK via the Objective-C Bridging Header.
import BVSDKThen add the following to your AppDelegate's didFinishLaunchingWithOptions function.
BVSDKManager.sharedManager().clientId = "YOUR_CLIENT_ID"
BVSDKManager.sharedManager().apiKeyShopperAdvertising = "YOUR_API_KEY"
BVSDKManager.sharedManager().staging = true // Set to false for production!Once a user is authenticated inside your user login workflow, set user information inside the BVSDKManager sharedManager object.
NOTE: The userAuthString created with your existing Bazaarvoice implementation logic needs to be given to the
BVSDKManager sharedManagerobject. However, the steps to encrypt your userAuthString are still applicable even if you are not a Conversations client.
If you don't have an authorization token set up yet, please refer to the example in User Authentication Token
Product Recommendations are simply views presented to users. They're shown using the same classes you already use in your storyboards, and can be formatted to match your app's visual design. When a set of product recommendations load, your app will receive an array of BVProduct objects that contains its assets, and the app (rather than the SDK) is then responsible for displaying each BVProduct object.
BVSDK provides the following view containers to show multiple product recommendations:
BVProductRecommendationsCollectionViewBVProductRecommendationsTableViewBVProductRecommendationsContainer
These classes should be used as the base view for the container you show your product recommendations in.
BVSDK also provides the following view objects to show a single product recommendation:
BVRecommendationCollectionViewCellBVRecommendationTableViewCellBVProductRecommendationView
Similarly, these classes should be used as the base class of the view you show the product recommendation in.
NOTE: This following code samples are in Swift 2.0.
Let's run through an example implementation of BVProductRecommendationsCollectionView. Following this example will produce a scrollable view of product recommendations, as shown below:

- Create a collectionViewCell:


- Set its superclass as
BVRecommendationCollectionViewCellin theDemoCell.swiftfile, and add appropriate view outlets:
class DemoCell: BVRecommendationCollectionViewCell {

    @IBOutlet weak var productName : UILabel!
    @IBOutlet weak var price : UILabel!
    @IBOutlet weak var numReview : UILabel!
    @IBOutlet weak var rating : UILabel!
    @IBOutlet weak var productImageView : UIImageView!
    @IBOutlet weak var starRating : HCSStarRatingView!

}TIP: The
DemoCelloutlets above are suggestions for how to build a custom cell. These outlets map efficiently to eachBVProductdata object. However, these outlets are not required and you can configure your cell any way you like!
- In
DemoCell.xib, add and position your views and hook up your outlets:

- Create a
UIViewController:
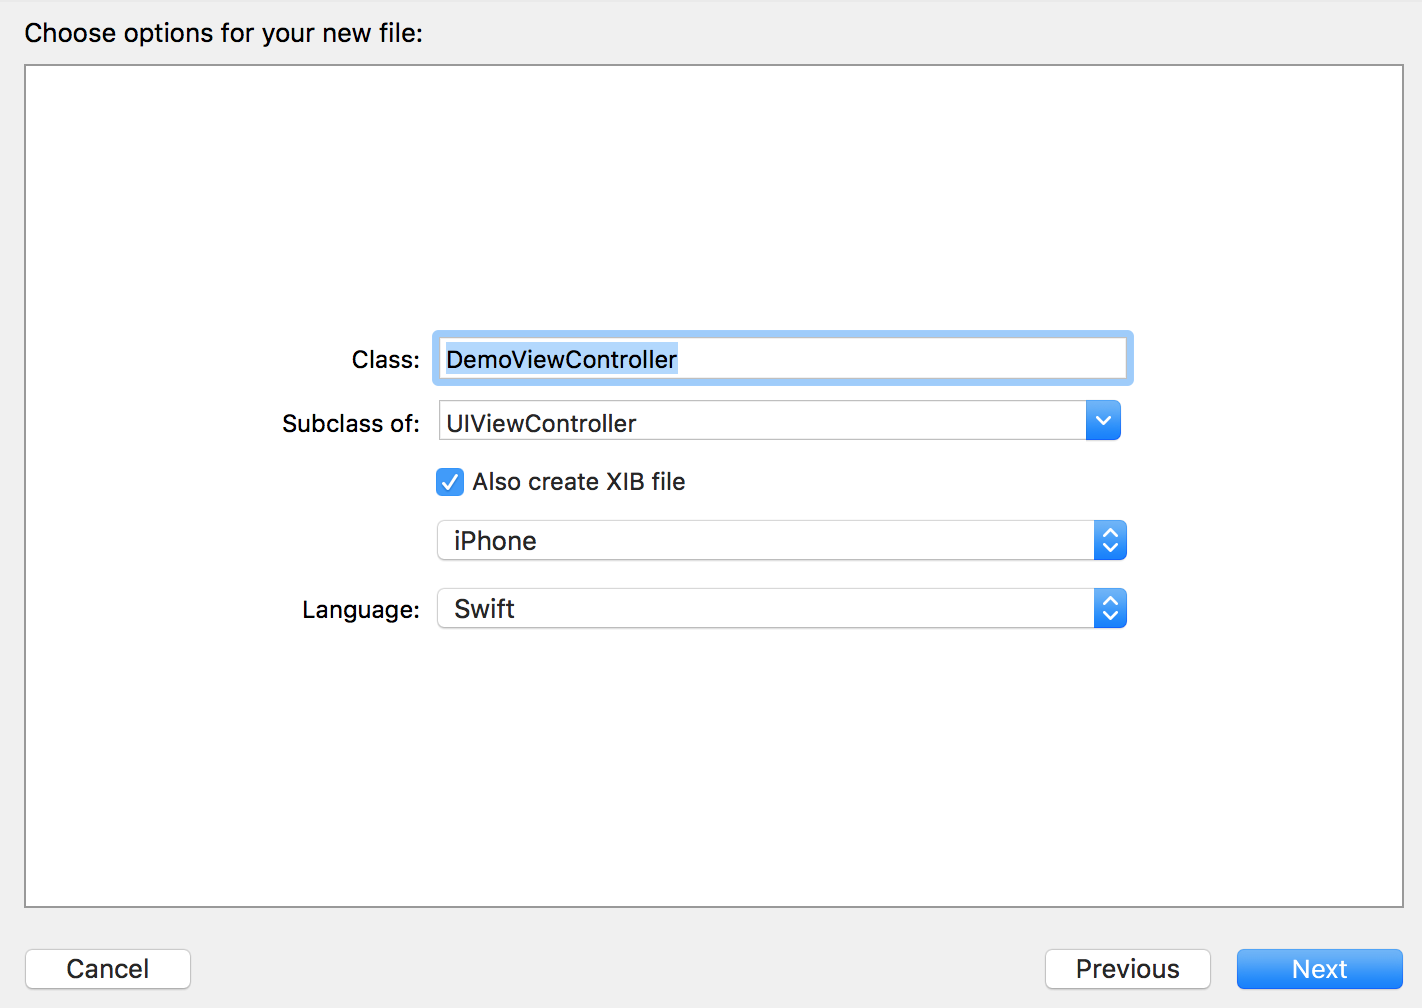
- Add an outlet for the collection view:
class DemoViewController: UIViewController {
    @IBOutlet weak var recommendationsView : BVProductRecommendationsCollectionView!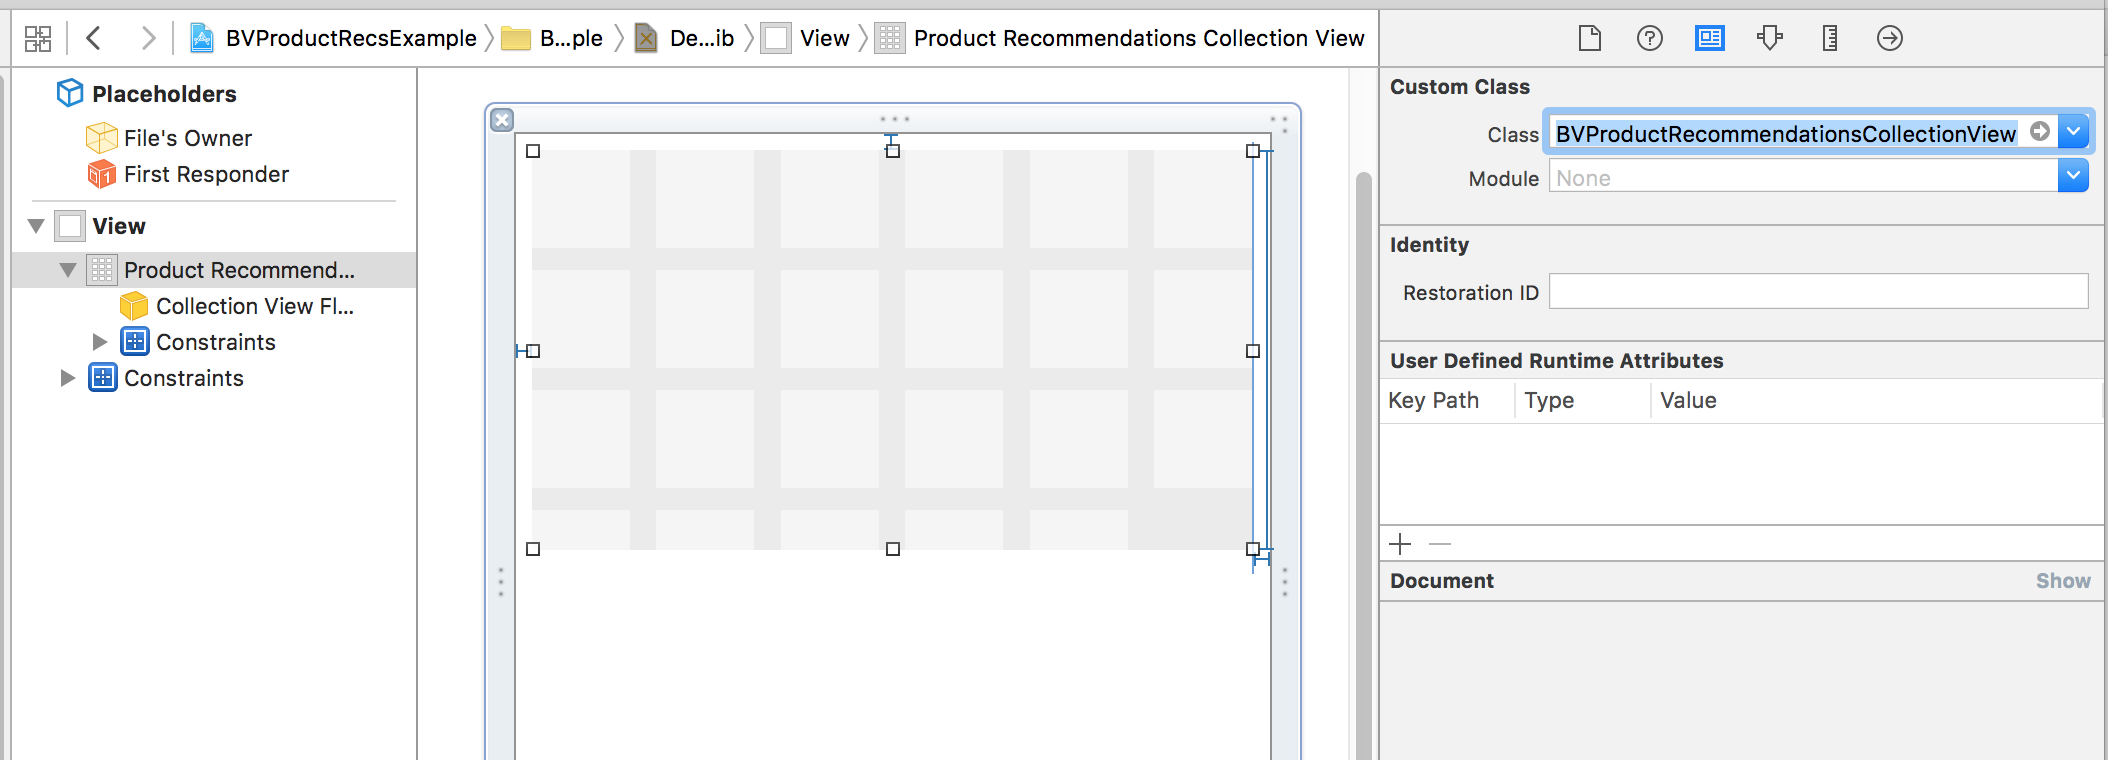
} - Add a
UICollectionViewto your nib, and set its class toBVProductRecommendationsCollectionView:
- Hook up the
BVProductRecommendationsCollectionViewto its outlet,recommendationsView:

- Fetch product recommendations, and store them in a variable for later use. We also want to set up our
recommendationsViewdelegate and datasource, and register the nib we created earlier.
class DemoViewController: UIViewController, UICollectionViewDelegate, UICollectionViewDataSource {

    @IBOutlet weak var recommendationsView : BVProductRecommendationsCollectionView!
    var recommendations : [BVProduct] = []

    override func viewDidLoad() {
        super.viewDidLoad()

        recommendationsView.registerNib(UINib(nibName: "DemoCell", bundle: nil), forCellWithReuseIdentifier: "DemoCellIdentifier")

        self.recommendationsView.delegate = self
        self.recommendationsView.dataSource = self

        let request = BVRecommendationsRequest(limit: 20)
        self.recommendationsView.loadRequest(request, completionHandler: { (recommendations:[BVProduct]) in

            self.recommendations = recommendations
            self.recommendationsView.reloadData()

        }) { (error:NSError) in
            // handle error case
        }

    }
}- Create and fill out
collectionView:numberOfItemsInSection::
func collectionView(collectionView: UICollectionView, numberOfItemsInSection section: Int) -> Int {
    return self.recommendations.count ?? 0
}- Create a fill out
collectionView:cellForItemAtIndexPath::
NOTE: The image loading is done with
SDWebImage.
func collectionView(collectionView: UICollectionView, cellForItemAtIndexPath indexPath: NSIndexPath) -> UICollectionViewCell {

    let cell = collectionView.dequeueReusableCellWithReuseIdentifier("DemoCellIdentifier", forIndexPath: indexPath) as! DemoCell

    let product = recommendations[indexPath.row]
    let imageUrl = NSURL(string: product.imageURL)

    // Must set the bvProduct on each cell
    cell.bvProduct = product

    cell.productName.text = product.productName
    cell.rating.text = "\(product.averageRating ?? 0)"
    cell.numReview.text = "(\(product.numReviews ?? 0) reviews)"
    cell.productImageView?.sd_setImageWithURL(imageUrl)

    return cell;
}The app should populate the collection view with product recommendations. Some styling will be needed to look good, however 😄