Minimal & secure ERC20 dashboard/wallet. using lightwallet.js, ethereumjs & etherscan as node provider
Designed special for ERC20 projects. Just insert address of ERC20 smart contract and wallet ready to go. All the logic of this panel working on the front-end (in the user's browser), the user himself keeps his keys, never sends to our or another server.
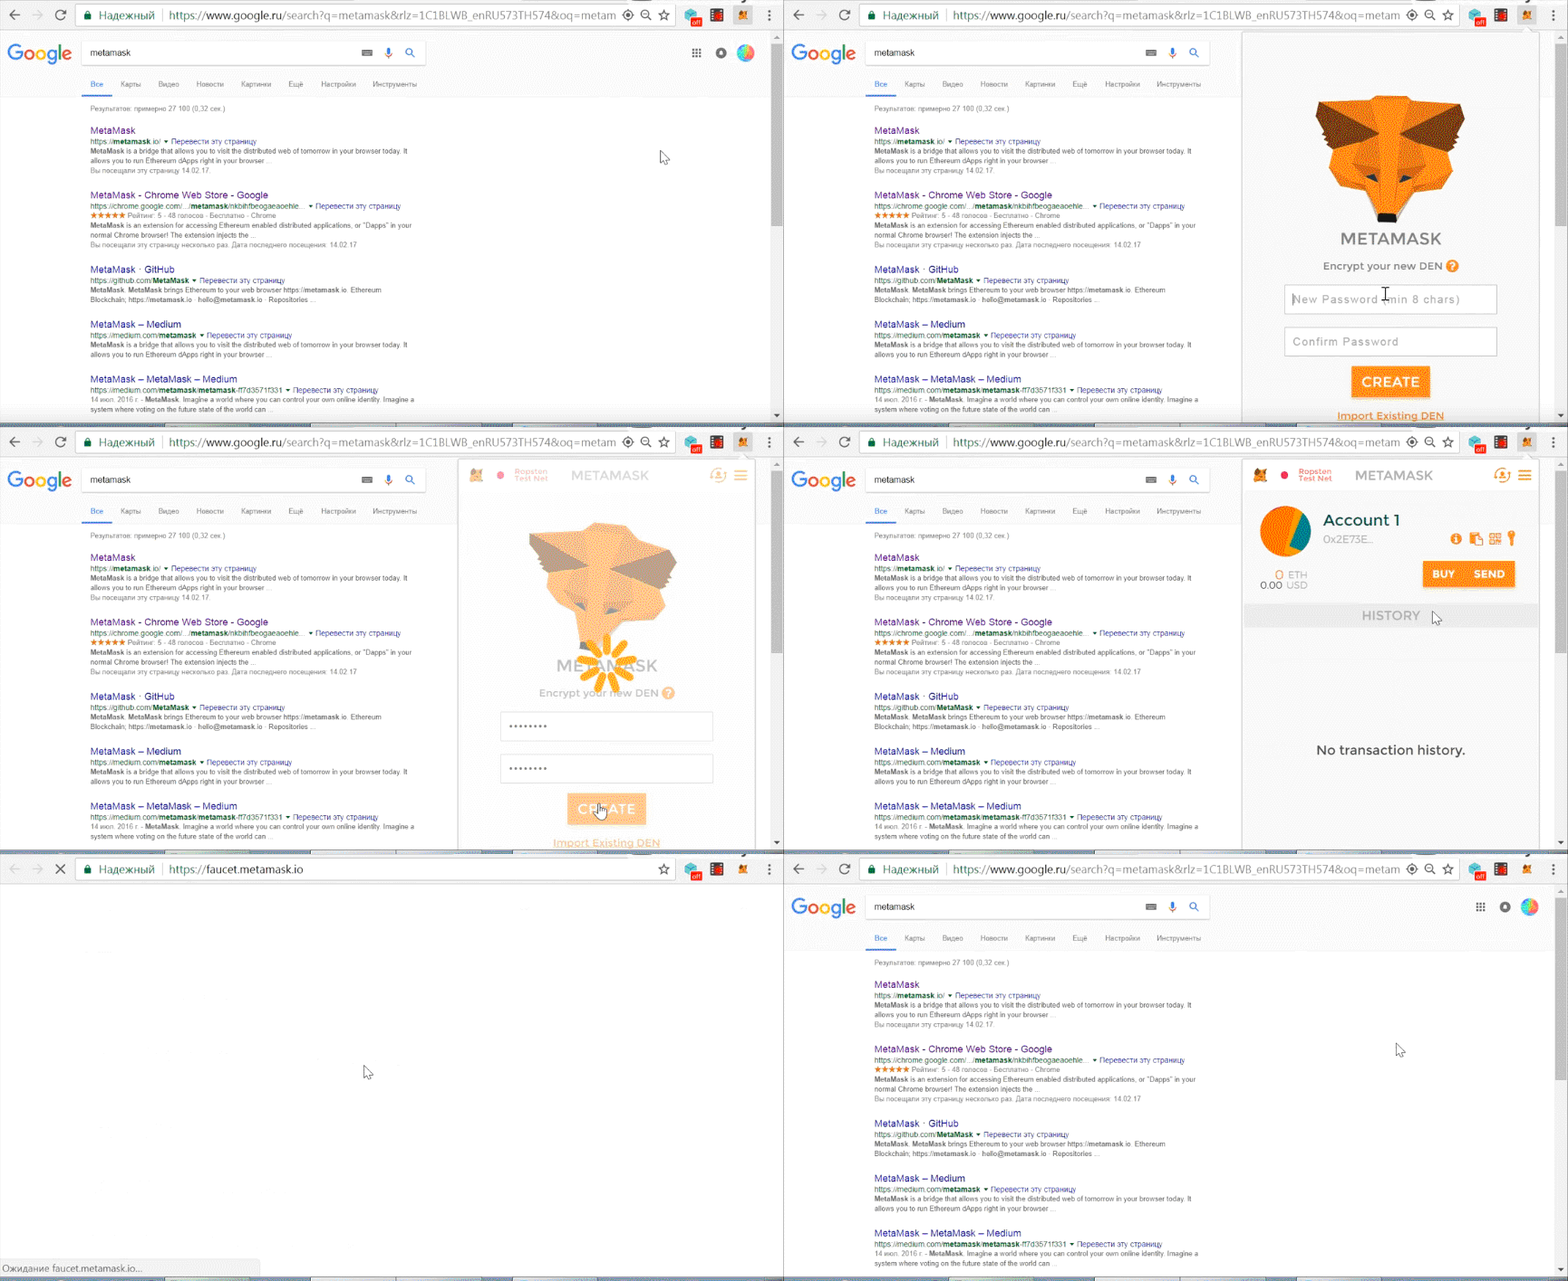
You must have any ethereum wallet, we recommend Metamask. Metamask have connection to ethereum testnet - you will get 1 ETH on your address for testing. https://metamask.io 2.1 Go to https://remix.ethereum.org and paste this code in Left area.contract MyToken {
/* This creates an array with all balances */
mapping (address => uint256) public balanceOf;
/* Initializes contract with initial supply tokens to the creator of the contract */
function MyToken(
uint256 initialSupply
) {
balanceOf[msg.sender] = initialSupply; // Give the creator all initial tokens
}
/* Send coins */
function transfer(address _to, uint256 _value) {
if (balanceOf[msg.sender] < _value) throw; // Check if the sender has enough
if (balanceOf[_to] + _value < balanceOf[_to]) throw; // Check for overflows
balanceOf[msg.sender] -= _value; // Subtract from the sender
balanceOf[_to] += _value; // Add the same to the recipient
}
}
MINIMUM VIABLE TOKEN from https://ethereum.org/token

2.2 Go to Environment.
2.3 Select "Injected Web3"
2.4 set "initial suply" as you want (e.x. 10000 tokens)
2.5 click create
2.6 wait about 30 seconds and copy your contract address (0x....) to buffer.
Click FORK at bottom of this page 
4.1 Go to cloned repositary settings (1) and rename repositary to something like "supercoinWallet" (2,3)

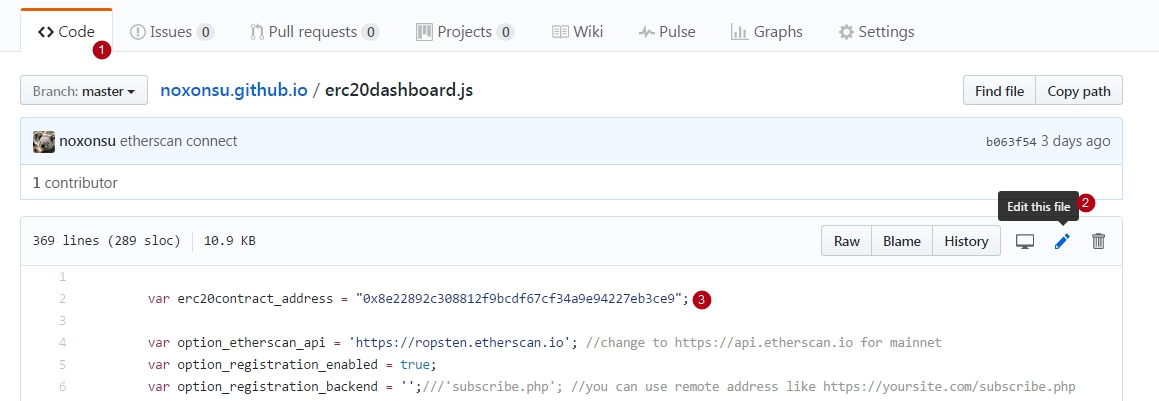
4.3 Go to Code > erc2dashboard.js (1) > click Edit (2) and paste contract address from bufer to "erc20contract_address" var (3).

4.4 Done. Now you can see your dashboard at https://{yourgithublogin}.github.io/superWallet
4.5 Now you can add custom domain. https://help.github.com/articles/quick-start-setting-up-a-custom-domain/
Copyright 2017
Permission is hereby granted, free of charge, to any person obtaining a copy of this software and associated documentation files (the "Software"), to deal in the Software without restriction, including without limitation the rights to use, copy, modify, merge, publish, distribute, sublicense, and/or sell copies of the Software, and to permit persons to whom the Software is furnished to do so, subject to the following conditions:
The above copyright notice and this permission notice shall be included in all copies or substantial portions of the Software.
THE SOFTWARE IS PROVIDED "AS IS", WITHOUT WARRANTY OF ANY KIND, EXPRESS OR IMPLIED, INCLUDING BUT NOT LIMITED TO THE WARRANTIES OF MERCHANTABILITY, FITNESS FOR A PARTICULAR PURPOSE AND NONINFRINGEMENT. IN NO EVENT SHALL THE AUTHORS OR COPYRIGHT HOLDERS BE LIABLE FOR ANY CLAIM, DAMAGES OR OTHER LIABILITY, WHETHER IN AN ACTION OF CONTRACT, TORT OR OTHERWISE, ARISING FROM, OUT OF OR IN CONNECTION WITH THE SOFTWARE OR THE USE OR OTHER DEALINGS IN THE SOFTWARE.
