Built with
React, styled withSass, fetched data withREST API
I took a role as the project manager and front-end developer for this project. Our team consisted of three front-end developers and one back-end developer. we planned and developed a new plant shopping mall web service by modeling the Nike website. For the products to be sold on our e-commerce service, we decided on plants, plant pots, and plant care products.
The Nike website had a trendy and simple design that emphasized visual elements, especially on the main page, which was suitable for showcasing a storyline. Our product category criteria were as follows:
- The ability to actively use images and tell a story.
- Ease of obtaining consistent high-quality images, as we couldn't plan and shoot product photos ourselves.
- Connection points with Nike's Value proposition.
Nike is a brand that sells sportswear, sneakers, and sports-related accessories, and it conveys values such as active energy, a positive mindset, and ultimately a healthy lifestyle through these products. We believed that the vitality of plants and the comfort and joy that can be felt through the process of growing them are connected to a healthy lifestyle.
In fact, plants are no longer just the domain of housewives or retirees. If you look at areas that young people are interested in, such as their own spaces with unique tastes, living in their own homes with pets or companion plants, you can often find keywords related to plants.
Components for Home Screen - PR
There were two main features implemented on the main screen:
- When the
onMouseOverevent occurs on each menu in the navigation bar, a dropdown menu is displayed. - Clicking the buttons on the product card carousel allows for left and right movement with the
useStatehook.
To capture users' attention on the home screen, which can be considered the face of the service, I inserted a video. To ensure that the project files didn't become too heavy, I implemented it to fetch video via URLs from the cloud since they are static media.

I placed a product card carousel that provides easy access to the core area of the service, the product list. Clicking the "Learn More" CTA button redirects users to each product's detailed page. To actively encourage user button clicks, I applied an animation effect that changes the color when hovering over the buttons.
For efficient maintenance, I separated frequently used UI elements into components and made extensive use of props and the Array.map() method.
{PLANT_CARD.map(({ id, image_url, subCategoryId }) => {
  return (
    <MainPlantCard
      key={id}
      id={id}
      image_url={image_url}
      subCategoryId={subCategoryId}
    />
  );
})}
Product List Screen Components - PR
On the product list screen, I implemented pagination, filtering, sorting, and product search functionality using query strings. I used the useSearchParams hook to modify the query strings in the URL and dynamically display the corresponding product list. I implemented the sorting buttons using the useState hook.
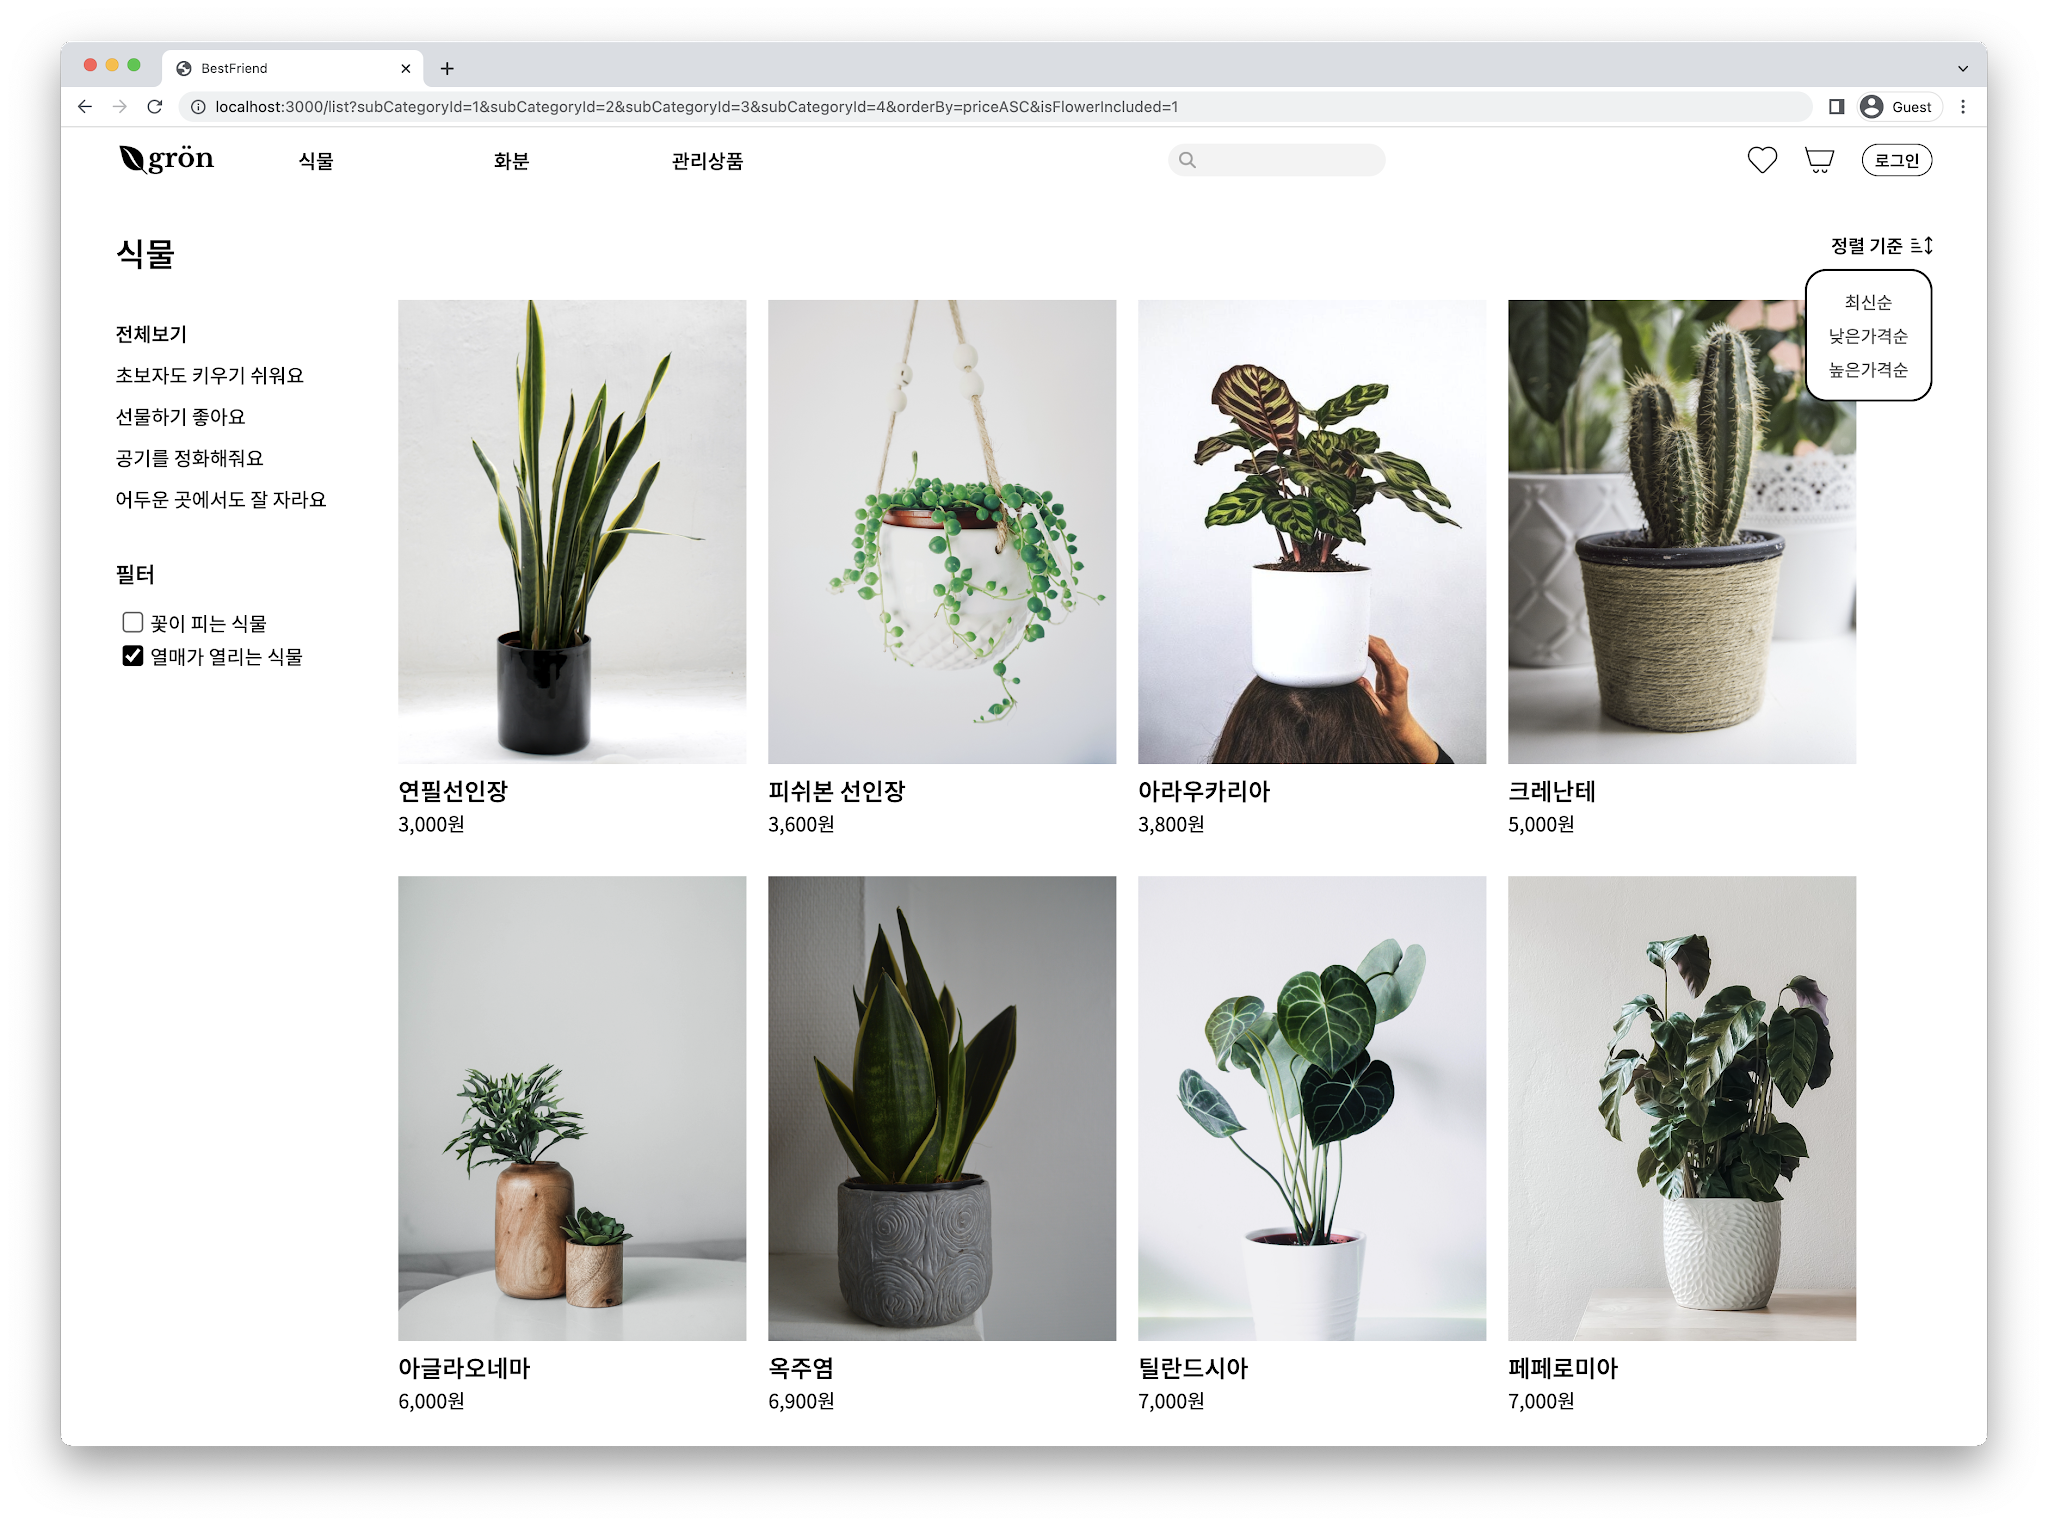
Working with query strings was the most challenging part of this project's development work and took a considerable amount of time. The concept of managing changing states through URLs wasn't initially clear to me, so it took me a while to understand how to use the methods. Once I understood it, I could implement multiple functionalities with a single method, so writing the actual code didn't take long.
const [searchParams, setSearchParams] = useSearchParams();
searchParams.set('limit', LIST_LIMIT);
const movePage = pageNum => {
  searchParams.set('offset', (pageNum - 1) * LIST_LIMIT);
  setSearchParams(searchParams);
};
Review Post and Delete: Using HTTP Methods - PR
In the review functionality on the product detail page, I had the opportunity to use the useState hook and HTTP communication methods such as GET, POST, and DELETE. Reviews could only be left when logged in, and only reviews made by the user could be deleted.
I included the login token in the headers when making POST and DELETE API requests. GET and POST required the product ID to allow reviews to be posted on each product's detail page. To achieve this, I separated the review component as a child component of the parent product detail page component, and I passed the login token value and product ID value as props.
The issue I encountered was that after making DELETE and POST requests, the backend database stored the data correctly, but the frontend UI didn't reflect the changes until a page refresh occurred. The reason was that there was a missing step to update the changed data on the frontend after DELETE and POST requests. To resolve this, I added the logic to fetch data again by making a GET request after the POST request has succeeded.
const Review = ({ productsId, token }) => {
  const [reviewList, setReviewList] = useState([]);
  const [reviewText, setReviewText] = useState('');

  // Review GET
  const getReview = () => {
    fetch(`${APIS.reviews}/${productsId}`)
      .then(res => res.json())
      .then(data => {
        setReviewList(data.Review);
      });
  };

  // Review POST
  const handleReviewPost = e => {
    if (e.key === 'Enter' && reviewText !== '') {
      fetch(`${APIS.reviews}/${productsId}`, {
        method: 'POST',
        headers: {
          'Content-Type': 'application/json;charset=utf-8',
          Authorization: token,
        },
        body: JSON.stringify({
          product_id: productsId,
          comment: reviewText,
        }),
      })
        .then(res => res.json())
        .then(data => {
          getReview();
          setReviewText('');
        });
    } else return;
  };

  // Review DELETE
  const handleReviewDelete = id => {
    if (!window.confirm('Are you sure to delete the review?')) return;
    fetch(`${APIS.reviews}/${id}`, {
      method: 'DELETE',
      headers: {
        'Content-Type': 'application/json;charset=utf-8',
        Authorization: token,
      },
    }).then(res => {
      if (res.ok) {
        getReview();
      } else throw new Error('Error occurred');
    });
  };

  useEffect(() => {
    getReview();
}, []);During the development process, the API addresses changed every time, since we used a local server. As multiple branches were merged, various versions of API addresses ended up in the code which caused numerous conflicts. We discussed and created a separate .js file to manage API addresses as shown below. This made maintenance more efficient, and the errors significantly decreased.
export const BASE_URL = 'API url';

export const APIS = {
  products: `${BASE_URL}/products`,
  users: `${BASE_URL}/users`,
  carts: `${BASE_URL}/carts`,
  likes: `${BASE_URL}/likes`,
  orders: `${BASE_URL}/orders`,
  reviews: `${BASE_URL}/reviews`,
  galleries: `${BASE_URL}/galleries`,
};I deployed the project to the web using AWS S3 Bucket. Currently, I have redeployed the project using Vercel.
Since it was a short two-week project, we applied agile methodology to efficiently manage the project and conducted two one-week sprints. Our team's first sprint goal was to create an MVP (Minimum Viable Product). Therefore, in Sprint 1, we focused on the essential pages and features that must be included in the plant e-commerce platform, and additional features were planned for Sprint 2.
As a Project Manager, I contemplated how to effectively manage the project. I incorporated many aspects of the workflow and valuable feedback from colleagues from my previous company. My goals as a PM were as follows:
- Transparency for all team members to know what tasks everyone is working on.
- Establishing an asynchronous communication environment to reduce repetitive questions and inefficient communication.
To achieve these goals, I attempted various forms of documentation and managed development tickets through a Kanban board. We primarily used Figma, Notion, and Trello as collaboration tools.
Taking into account the tickets that were not fully completed in Sprint 1, all team members gathered to discuss what tasks should be undertaken in the second sprint. From a project management perspective, we recognized the need for workflow to improve prioritization.
I suggested adding a "Priority" field to each ticket, which allowed us to prioritize essential (High, Medium) and optional (Optional) tickets in Sprint 2. This allowed us to work on tasks in alignment with the same direction.
On the last day of the project, as we prepared for the demo day presentation, I hosted a retrospective session with the team. The points that resonated with everyone during the retrospective were as follows:
- Effective communication among team members.
- All the essential features we planned have been implemented successfully.
- Preparing and summarizing individual talking points in Notion before Daily Standup meetings, resulting in efficient meetings.
- All team members managed their Trello tickets well and executed tasks according to the plan.
- Consideration of potential bugs when implementing features.