Want to create a bootable operating system from a Containerfile? Download this extension!
Easily go from container to VM / ISO-on-a-USB / RAW image!
- Technology
- Use Case
- Requirements
- Installation
- Usage
- Advanced Usage
- Preferences
- Known Issues
- Contributing
The Bootable Container (bootc) extension uses bootc-image-builder in order to build bootable container disk images.
Once a machine is created from the disk image, it can apply transactional updates "in place" from newly pushed container images (without creating a new disk image). For more information, see bootc.
There are many projects at work at creating "bootc" images. Below is a non-exhaustive list of compatible images which are known to work with bootc-image-builder.
| Distribution | Repo | Examples | Docs |
|---|---|---|---|
| CentOS Stream 9 | quay.io/centos-bootc/centos-bootc:stream9 |
Examples | Docs |
| CentOS Stream 10 | quay.io/centos-bootc/centos-bootc:stream10 |
Examples | Docs |
| Fedora 42 | quay.io/fedora/fedora-bootc:42 |
Examples | Docs |
| Fedora 43 | quay.io/fedora/fedora-bootc:43 |
Examples | Docs |
| RHEL 9 | registry.redhat.io/rhel9/rhel-bootc:latest |
Examples | Docs |
| RHEL 10 | registry.redhat.io/rhel10/rhel-bootc:latest |
Examples | Docs |
The images can then be added to your Containerfile:
FROM quay.io/centos-bootc/centos-bootc:stream10If you want to learn more about bootable containers, please refer to the Fedora Getting Started Guide where you can find a number of videos, demos, best practices and detailed information.
Some concepts to grasp before using.
You are "creating" an OS straight from a Containerfile, isn't that awesome?
FIRST realize that you are creating an OS with all your applications, developer tools, even games that you want.
SECONDLY ask yourself what applications you want to have running (perhaps on boot too!).
Want a quick straight-to-the-point Hello World Containerfile?
FROM quay.io/centos-bootc/centos-bootc:stream9
# Change your root password for a "test login" that
# allows to log in on a virtual/physical console
# NOTE: While some base images may set `PermitRootLogin prohibit-password`
# for OpenSSH, not all will.
# This is VERY dangerous and only meant for Hello World purposes.
RUN echo "root:root" | chpasswd
After creating your image you can now login and explore your bootable OS.
Want to view more example images Such as httpd and nvidia?
All of our maintained example images are on the gitlab.com/fedora/bootc/examples repo.
You can also pull our example image based on the httpd example:

Go from a bootc compatible derived container build to a disk image format:
qcow2: QEMU Disk Imagesami: Amazon Machine Imagesraw: RAW disk image an MBR or GPT partition tableanaconda-iso: Unattended installation method (USB sticks / install-on-boot)vmdk: Usable in vSpherevhd: Virtual Hard Diskgce: Google Cloud Engine
The list above is what is supported by the underlying bootc-image-builder technology. The list can be found here.
OS:
Compatible on Windows, macOS & Linux
Software:
Podman Machine is required for macOS and Windows in order to run Podman as well as utilize filesystem privileges to build a disk image.
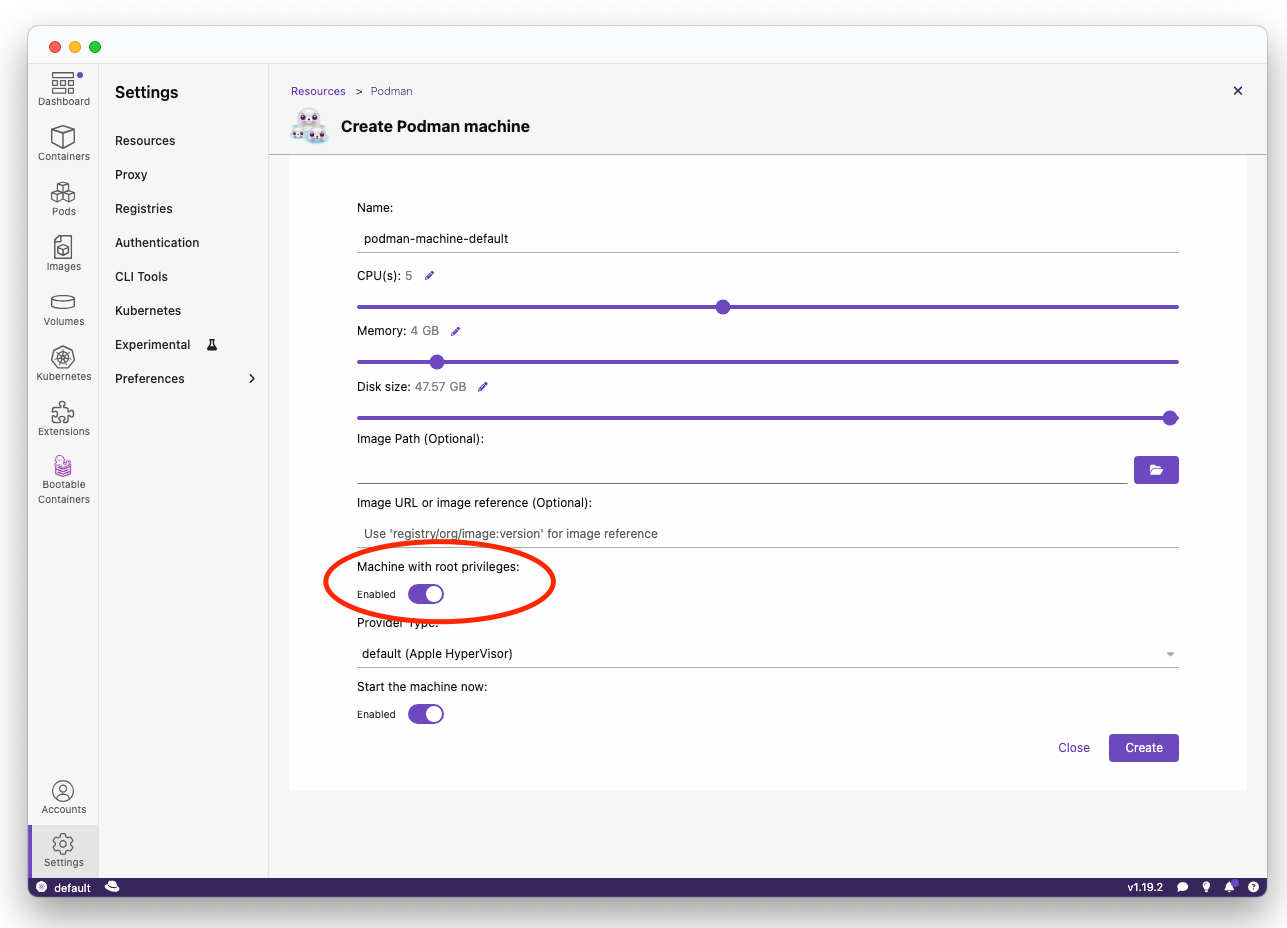
Podman Machine requirements:
- Rootful mode enabled
- At least 6GB of RAM allocated in order to build the disk image
Rootful mode can be enabled through the CLI to an already deployed VM:
podman machine stop
podman machine set --rootful
podman machine start
Or set when initially creating a Podman Machine via Podman Desktop:
During the build process, you will be asked to enter your credentials so that the bootc extension may run a sudo podman run underlying CLI command.
Podman Desktop is ran as the logged-in user. However, bootc-image-builder requires escalated / sudo privileges to run a rootful container.
You can find more information about what specific commands are being ran from the console logs of Podman Desktop.
This extension can be installed through the Extensions section of Podman Desktop within the Catalog tab:
- Go to Extensions in the navbar.
- Click on the Catalog tab.
- Install the extension.

A version of the extension using the latest commit changes can be installed via the Install custom... button with the following link:
ghcr.io/containers/podman-desktop-extension-bootc:nightly
- Build your bootc-enabled Containerfile:
In the example below, we are going to change the root password for testing purposes when accessing the OS.
FROM quay.io/centos-bootc/centos-bootc:stream10

# Change the root password
# CAUTION: This is NOT recommended and is used only for testing / hello world purposes
RUN echo "root:root" | chpasswd
- Build the disk image:
Build the disk image, this takes approximately 2-5 minutes depending on the performance of your machine.
- Testing the image locally (macOS and Linux):
You can test the image locally on both macOS and Linux using the "Create VM" button on the "Disk Images" page. Windows support is upcoming.

After building, there are multiple ways you can use the outputting image format.
- Virtually: Use the built-in support in the extension that uses macadam, see our usage guide.
- Third-party software: Launch the image using your preferred virtualization software, such as VMware, VirtualBox, virt-manager (libvirt), QEMU, or GNOME Boxes.
- USB flash drive: Use tools like balenaEtcher, Rufus or Fedora MediaWriter to flash the image to a USB stick. Then boot from it on real hardware.
The bootc CLI command is the "bread-and-butter" of all bootc-derived images.
Once booted into the system, you can manage it using the bootc CLI:
- Status:
bootc statusshows the current image and version. - Upgrade:
bootc upgradepulls the latest OCI image to apply next reboot. - Fetch:
bootc fetchpre-downloads an update without applying it. - Install:
bootc install --target /dev/sdXwrites the OS to a block device, good for when "live booting" on a USB flash drive for testing.
See bootc-dev.github.io/bootc for more information.
Preferences such as the default bootc-builder-image as well as timeouts can be adjusted within the Preferences section of Podman Desktop.

(macOS only) Unable to build cross-arch images:
This is a known upstream issue caused by limitations in podman machine and Rosetta 2 compatibility.
There is currently no workaround for macOS users.
If you need to build images for a different architecture (ex. AMD64), follow these steps:
- Build the image for the target architecture:
podman build --platform linux/amd64 -t quay.io/username/my-bootc-image . - Push the image to a registry:
podman push quay.io/username/my-bootc-image - Switch to a different machine that matches the target architecture (ex. AMD64).
- Pull the image on that machine:
podman pull quay.io/username/my-bootc-image - Build as usual with the bootc extension.
Alternatively, you can also export and import the image between machines using our managing images tutorial.
(Linux only) Unable to create virtual machine:
When creating a virtual machine on Linux, you may encounter a "macadam binary is missing" or "gvproxy binary is missing" message. This is because the binaries required have to be installed manually.
Follow the below steps for the solution:
macadam binary:
- Download the macadam binary
chmod +x macadam-linux-amd64sudo mkdir -p /opt/macadam/binsudo mv macadam-linux-amd64 /opt/macadam/bin/macadam
gvproxy binary:
- Download the gvproxy binary
chmod +x gvproxy-linux-amd64sudo mkdir /usr/libexec/podmansudo mv gvproxy-linux-amd64 /usr/libexec/podman/gvproxy
Want to help develop and contribute to the bootc extension? View our CONTRIBUTING document.