-
创建page页面, 1.1 目录/src/pages/tabbar/下右键创建page, 分别demo.js,demo.wxss,demo.xml,demo.json
1.2 demo.js引入wx.ct.$page变量const { $page } = wx.ct $page({ data:{}, })1.3 app.json中添加页面至导航栏中
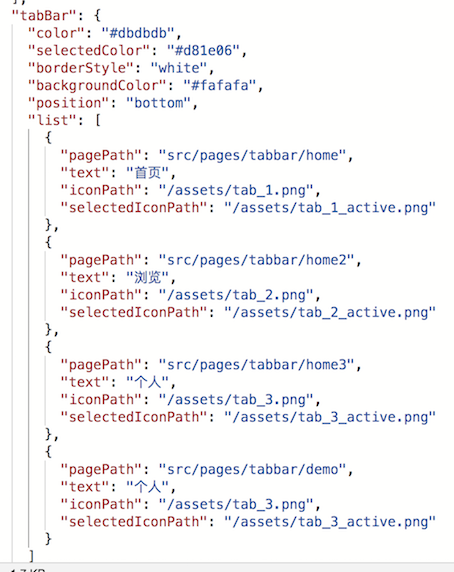
tabBar: {
  list: [{
     "pagePath": "src/pages/tabbar/demo",
     "text": "示例",
     "iconPath": "/assets/tab_3.png",
     "selectedIconPath": "/assets/tab_3_active.png"
   }]
}
1.4 点击示例导航将看到刚添加的页面
-
在store/reducers/demo.js中增加state和reducers
// wx.ct.$store.commit('demo/demoAction', { id: 123 })
const state = {
  userInfo: null,
  count: 0
}

const reducers = {
  mergeCount ({state}, payload) {
    state.count = payload
  }
}

export default {
  state,
  reducers
}
- 在store/actions/demo.js中增加actions
// wx.ct.$store.dispatch('demo/demoAction', { id: 123 })
const actions = {
  mergeCountAction({ commit }, payload) {
    return commit('demo/mergeCount', payload)
  },
  mergeCountActionAsync ({commit}, payload) {
    return new Promise((resolve, reject) => {
      const res = commit('demo/mergeCount', payload);
      resolve(res)
    });
  },
}
export default {
  actions
}
- 修改demo.wxml/demo.js
demo.wxml
<!--src/pages/tabbar/demo.wxml-->
<view>
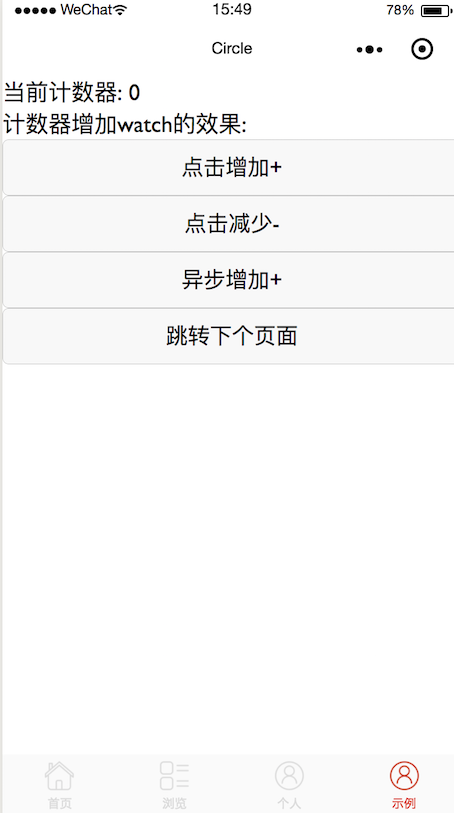
<view>当前计数器: {{ count }}</view>
<view>计数器增加computed的效果: {{ watchCount }}</view>
<view>
<button bindtap="increment">点击增加+</button>
<button bindtap="decrement">点击减少-</button>
<button bindtap="asyncIncrement">异步增加+</button>
</view>
<view><button bindtap="goToNext">跳转下个页面</button></view>
</view>
demo.js
const {
  $page,
  $store,
} = wx.ct

$page({
  data: {
    count: $store.state.demo.count
  },
  computed: {
    watchCount () {
      return $store.state.demo.count * Math.random()
    }
  },
})
5. 增加交互效果
5.1 增通过发起dispatch修改数据
demo.js
const {
  $page,
  $store,
} = wx.ct

$page({
  data: {
    count: $store.state.demo.count
  },
  computed: {
    watchCount () {
      return $store.state.demo.count * Math.random()
    }
  },
  increment() {
    const res = $store.dispatch('demo/mergeCountAction', ++this.data.count)
    this.setData({
      count: res.count
    })
  },
  decrement() {
    const res = $store.dispatch('demo/mergeCountAction', ++this.data.count)
    this.setData({
      count: res.count
    })
  },
  asyncIncrement() {
    $store.dispatch('demo/mergeCountActionAsync', ++this.data.count)
      .then(res => {
        this.setData({
          count: res.count
        })
      })
  }
})
- 跳转页面
6.1 在/public/router/index.js中添加路径配置
 6.2 引入$api/$routerMap,实现页面跳转
const {
  $page,
  $store,
  $api,
  $routerMap
} = wx.ct

$page({
  goToNext () {
    $api.navigateTo($routerMap.articlemain)
  }
})
|——assets              # 资源
|——public               # 公用文件
  |——config             # 默认配置
  |——i18n               # 国际化文件
  |——router             # 路由配置
  |——utils              # 工具类
  |——aop                # 路由拦截
  |——api                # wxapi封装
  |——basePage           # 初始化page页面
  |——index              # 引用页
  |——loader             # loading
  |——request            # 请求页面
  |——share              # 处理分享后进入页面
  |——
|——src
  |——components         # 公共组件目录
    |——scrollList       # 组件目录
  |——pages
    |——module1          # 功能目录
    |——module2          # 功能目录
  |——route
    |——index            # 路由页面,空页面
  |——template           # 模板库
    |——template1        # 模板
    |——template2        # 模板
|——store                # 数据层
  |——actions            # actions层
    modules.js
    index.js
  |——reducers           # reducers层
    modules.js
    index.js
  index.js
|——utils                # 工具类
  utils.js
wx.ct = {
  $api,
  $request,
  $share,
  $page,
  $router,
  $routerMap,
  $config,
  $t,
  $store
}
** app.js **
app.js是程序的主要入口,但这里主要就是初始化数据源
let app = {
  onLaunch(options) {
    console.warn('app options', options)
    require('./public/index.js')
    wx.ct.$store = require('./store/index.js').default
  },
  onShow() {
  }
}
在onload函数运行时,初始化引入所有公共资源。
同时把所有资源暴露在wx.ct对象中。
wx.ct对象是自定义的上下文,其实store层也可以写进public里面的。
独立出来,是因为层级不想写得太深,数据层修改比较多,方便找到。
** public--index.js **
public目录下的index是主要解析与加载资源的入口,主要引入需要加载的资源和把api写入到wx.ct对象中。
import $api from './api'
import $request from './request'
import $share from './share'
import $page from './basePage'
import $t from './i18n/index.js'
import $router, { $routerMap } from './router/index.js'
import $config from './config/index.js'

wx.ct = {
  $api,
  $request,
  $share,
  $page,
  $router,
  $routerMap,
  $config,
  $t
}
** public--api.js **
api文件主要针对微信内置api进行一层封装,方便控制,同时把API的回调方式增强为promise写法,
不再使用callback方式。但有些方式不适合转化方式,故过滤就行了。
const wxToPromise = () => {
  const o = {}
  Object.keys(wx).map(key => {
    if (noPromiseMethods.indexOf(key) === -1 && key.substr(0, 2) !== 'on' && !(/\w+Sync$/.test(key))) {
      o[key] = toPromise(key)
    } else {
      o[key] = wx[key]
    }
    // 路由处理
    if (navigatorMethods.indexOf(key) !== -1) {
      const cb = o[key]
      o[key] = (...args) => {
        const res = aopRouter(...args)
        if (res) {
          return cb(res)
        }
      }
    }
    if (dialogMethods.indexOf(key) !== -1) {
      const cb = o[key]
      o[key] = (...args) => {
        return cb(aopDialog(key, ...args))
      }
    }
  })
  return o
}
export const toPromise = (key, object = {}) => {
  return (o = {}) => {
    return new Promise((resolve, reject) => {
      o = Object.assign({}, object, o)
      o.success = function (res) {
        resolve(res)
      }
      o.fail = function (res) {
        reject(res)
      }
      wx[key](o)
    })
  }
}
从上述代码中,例如原先调用
wx.setStorage({key: 'test', data: 'test value', success() {console.log('test success')}})
修改为:
wx.ct.$api.setStorage({key: 'test', data: 'test value'}).then(res => {console.log('test success')})
对特殊的API进行特殊的处理,暂时对Router(路由)/Dialog(弹窗)/AsyncAPI(同步的API)/SpecialAPI(特殊的API)进行处理。
下面分析下Router/Dialod两部分。
** Router **
router跳转时,会做出登录权限校验,所有在public/router/index.js文件中是对项目中所有路由进行简单的权限配置。
routeKeyName: String {
  url: String,
  isNeedLogin: Boolean
}

eg:

routeindex: {
  url: '/src/route/index',
  isNeedLogin: false
},
同时这里把所有的routeKeyName暴露在wx.ct.$routerMap下,方便通过$routerMap.keyName拿到值。
这样方便在路由跳转时,使用
无参:wx.ct.$api.reLaunch(wx.ct.$routerMap.keyName)
带参:wx.ct.$api.reLaunch(wx.ct.$routerMap.keyName[, params])
回过头来说下怎么校验是否已经登录,主要在文件public/aop.js
** public--aop.js **
1 跳转页面前的路由处理。
2 跳转参数对象化处理。
这里没有限制,按照情况自行更改。
根据自行业务需求,在登录成功后可以把状态写在storage中,示例是存储在key为login值。
判断逻辑主要看配置表(public/router/index.js)中目标访问路径下isNeedLogin是否为true。
为true时会对login状态进行深一层的判断。
const { $router } = wx.ct
const hasLogin = wx.ct.$api.getStorageSync('login')

console.warn('$router', $router, urlKey, params, cb)

if ($router[urlKey]) {
  if ($router[urlKey].isNeedLogin && Boolean(hasLogin)) {
    console.error('need login')
  } else {
    const tmp = Object.assign({}, $router[urlKey])
    const url = tmp.url + (params ? "?" + _obj2url(Object.assign({}, params)) : '')
    return {
      url: url
    }
  }
} else {
  console.error('url do not found')
}
上述可扩展的很多,如果跳转的页面需要先授权,可以在need login的逻辑进行处理。
** Dialog **
在public/aop.js中,还针对弹窗的样式统一处理,统一管理减少代码操作。 修改样式也只修改这里。
export const aopDialog = (key, obj) => {
  if (key === 'showModal') {
    obj.showCancel = obj.showCancel !== undefined ? obj.showCancel : false
    obj.confirmColor = obj.confirmColor ? obj.confirmColor : 'red'
  }

  if (key === 'showToast') {
    obj.duration = obj.duration ? obj.duration : 1500
    obj.mask = obj.mask !== undefined ? obj.mask : true
  }
  return obj
}
** public--basePage.js **
basePage使用在写每一个新页面的时候,多了一些computed的操作。会考虑加入mixins跟watch,但发现暂也没有必要。
在页面触发setData时,会对所有页面的computed函数得新换算一次,并更新页面中的数据。
国际化的内容跟这紧密相关,页面中有国际化操作,都需要在computed中申明与使用。
例如
home.js

let { $page } = wx.ct
$page({
  data: {},
  computed: {
    t() {
      return {
        lang: this.$t('lang')
      }
    },
    someListState() {
      return this.$store.state.listState.filter(filter(item => item %2))
    }
})

html.wxml

<view>{{ t.lang }}</view>
这样在页面中就会及时更新数据。这里的computed类似vue中的computed,理解一下就行。
新手可以理解为computed内函数名就是data中的对象名,return返回就是对象对应的值。
用法跟data中申明的数据一样,只是setData时,computed的值会多一次刷新。(暂时不考虑性能。)
至于除了应用在国际化上,更多可以类似vue中的getters。
在someListState真正的值是this.$store.state.listState, 但增加了过滤效果。
例如[1,2,3],但实际在页面中只需要展示[2]。
数据在setData()之后, someListState会在页面中自动刷新。
** public--i18n/index.js **
引入国际化文件,暂只有中英文,可以通过page对象直接调用this.$changeLanguage()进行切换。
这是基于basePage.js把changeLanguage绑定在当前page实例中。
** public--request.js **
对wx.request进行一层封装处理。
1 请求头处理
2 请求前显示loading dialog。
3 请求完成时,code值判断与异常处理。
4 完成后hideloading dialog及完成回调。
5 增强除了callback,还可以通过promise方式处理。优先级别为:callback > promise
根据业务场景,可能需要完善下cookie跟状态码的处理。
原先:
wx.request({
  url: '/path?id=123', // 可加http/https开头,如果以/开头,会取config/index.js的httpUrl值。
  data: '',
  success(res) {},
  fail(error) {}
})
扩展为:
promise method:
wx.ct.$request({
  url: URL.GET_LOCATION_LIST,
  params: urlParams,
  data: payload,
}).then(res => {
  console.warn('get', res)
}).catch(err => {
  console.warn('outer catch', err)
})

callback method:

wx.ct.$request({
  url: URL.GET_LOCATION_LIST,
  params: urlParams,
  data: payload,
  success(res) {
    console.warn('res', res)
  }
})
能扩展还是因为以下操作。
static getConfig() {
  return {
    Cookies: Http.getCookies(),
    header: {
      'content-type': 'application/json'
    },
    dataType: 'json',
    method: 'POST',
    responseType: 'text',
  }
}
...
request () {
  return new Promise((resolve, reject) => {
    const options = this.beforeRequest(Object.assign({}, Http.getConfig(), this.options))
    console.warn('options', options)

    options.success = (res) => {
      this.success(res, resolve, reject)
    }
    options.fail = (err) => {
      this.fail(err, resolve, reject)
    }
    options.complete = () => {
      console.warn('complete')
      this.afterRequest()
    }
    this.requestTask = wx.request(options)
  })
}
** public--share.js **
这里是小程序分享的重点,可扩展跟维护各种分享页面。
1 通过分享进入的小程序,可通过直接跳转path或者执行actions处理。
2 统一设置分享api,简化api参数以及参数对象化。
方式一: 进入目标页面
onShareAppMessage () {
  return wx.ct.$share.createShare({path: 'path', id: 123})
}
return结果如下:
{
  path: "/src/route/index?share=true&id=123"
  title :"分享标题"
}

方式二:调用方法
onShareAppMessage () {
  return wx.ct.$share.createShare({action: 'actionname', id: 123, title: 'config设置默认标题。'})
}
return结果如下:
{
  path: "/src/route/index?share=true&action=actionname&id=123"
  title :"分享标题"
}
path: 分享进入的目标页。
action: 分享进入的后,可执行方法,在方法处理后,可跳转自行业务需求页面。方法名为store/actions中的方法。
params: 参数如果是跳转页面,会在page.$options中,跳转方法会回调在函数的参数中。
** store--index.js **
store应用基本用vuex相似,只是在封装层次上没有过多的校验。
1 对actions/state/reducers进行统一管理与初始化。
2 暴露dispath/commit方法提供调用。
3 store.state值存放在内存中,引用类型。
调用actions:
wx.ct.$store.dispatch('actionsnamespace/method', params)
or
wx.ct.$store.dispatch('actionsnamespace.method', params)

调用reducers:
wx.ct.$store.commit('reducers_namespace/method', params)
or
wx.ct.$store.commit('reducers_namespace.method', params)
#dbdbdb
#fafafa
#d81e06
#0752dd