T3 Chrome Extension : CSV Form Fill
T3 allows you to automatically fill out any Metrc form using just a CSV. It is one of the most powerful T3 tools available.
Modern CSV is the recommended software for editing CSVs. The basic version is free to use.
T3 CSV autofill reads out values from a .t3csv template file and writes these values into any Metrc form. The following fields all can be autofilled:
- Text fields
- Dropdown fields
- Slider fields
- Checkboxes
- Autocomplete fields (Packages, Locations, Strains, Items, etc)
- Photos
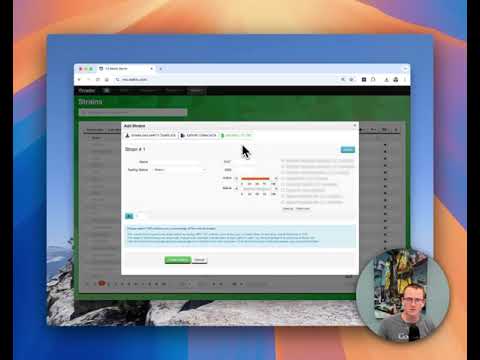
Demo of different form field types in T3 csv autofill
T3 free version limits the number of rows. T3+ has unlimited form fills.
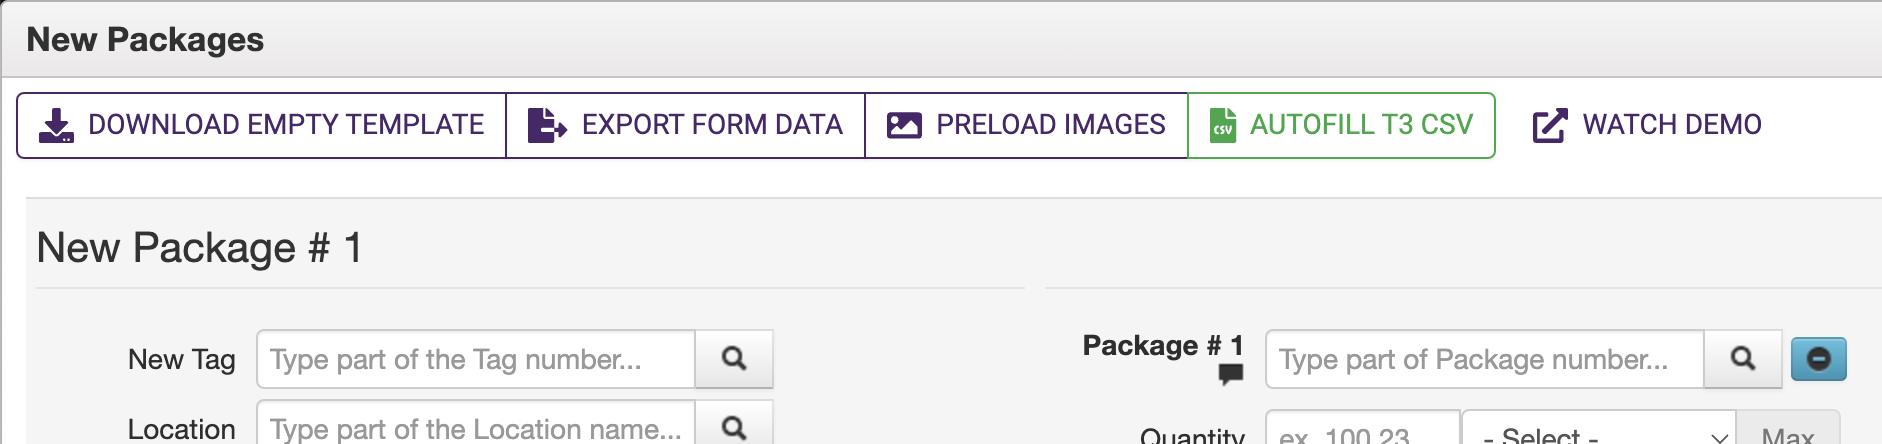
The T3 CSV Form Fill menu at the top of every Metrc form
The menu has the following options
-
DOWNLOAD EMPTY TEMPLATE: T3 will analyze the Metrc form and download an empty
.t3csvtemplate that you can fill out with any spreadsheet software like Excel or Google Sheets. -
EXPORT FORM DATA: T3 will read any values you have filled out in the form and download a prefilled
.t3csvfile. This is useful for figuring out how to fill out a.t3csvtemplate to accomplish autofilling values in a particular way. - PRELOAD IMAGES: This is used only when you need to upload images. Read on to learn how to autofill images and other files.
-
AUTOFILL T3 CSV: Prompts you to select a filled
.t3csvfile, which is autofilled into the form. This should only be done once each time a Metrc modal form is opened.
The following table describes what values T3 is capable of autofilling:
| Field type | Example Metrc field | How to enter in a .t3csv template |
|---|---|---|
| Text | Package note | Enter the text as you normally would, e.g. Example
|
| Number | Package quantity | Enter the number as you normally would, e.g. 15
|
| Dropdown | Item Category | Enter the text exactly as it appears in the dropdown, e.g. Flower
|
| Slider | Strain Indica % | Enter the percentage as a number, e.g. 50
|
| Checkbox | Use same pkg item | Leave blank for unchecked, otherwise any entered value is checked |
| Autocomplete | Package item | Enter the text that appears in the autocomoplete input, e.g. for a package autocomplete, the full package tag 1A4400000001000000001234
|
| Photo | Packaging Photo | Enter the exact filename of the preloaded photo, e.g. blue_dream_01.png
|
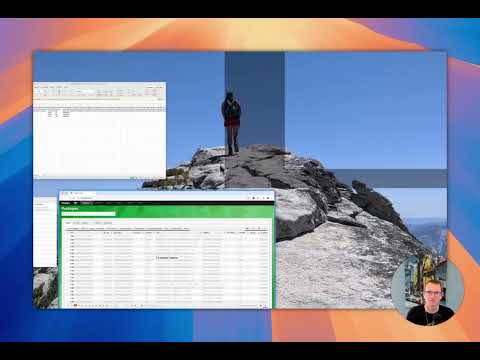
Watch a demo here
-
CSV Form Fill uses a special
.t3csvfile format.- You will fill out data into a
.t3csvand upload it to automatically fill out any Metrc form. Watch the Demo to see how it works.
- You will fill out data into a
-
Every Metrc form can be filled with CSV Form Fill. You are able to completely fill out a Create Transfer form with multiple transporters, packages, layovers, and destinations with a
.t3csv. -
Always start with a blank Metrc form. CSV Form Fill can only be used on a fresh Metrc form. If you've already started typing in values, or have alredy attempted a CSV form fill, close and re-open the Metrc modal window to reset the form.
-
A
.t3csvwill be mostly empty. T3 will skip empty cells, so you can use a.t3csvtemplate to autofill as much or as little as you want. -
Each Metrc form has its own
.t3csvtemplate. For example, the "Create Packages" Metrc form will uses a different template than "Adjust Packages". -
If you're not sure how to fill out a
.t3csv, fill out the Metrc form and export it. When you export a filled out Metrc form, T3 will generate a pre-filled.t3csvtemplate. Using this pre-filled file to autofill a fresh Metrc form will identically re-create what you had previously entered. -
CSV Form Fill supports filling out nested Metrc inputs. For example, to create an item with multiple ingredients, stack the ingredient names before starting the next item. T3 will automatically create the additional rows.
An example is shown below:
| line in repeaterData | ingredient in line.itemIngredients |
| itemName | ingredientName |
| Item Name | Ingredient Name |
| ItemA | ItemA Ingredient1 |
| ItemA Ingredient2 | |
| ItemA Ingredient3 | |
| ItemB | ItemB Ingredient1 |
| ItemB Ingredient2 | |
| ItemC | ItemC Ingredient1 |
| ItemC Ingredient2 | |
| ItemC Ingredient3 | |
| ItemC Ingredient4 |
A .t3csv file is essentially the same as a regular .csv file. The only difference is that the top two rows are reserved for form data, and the column headers start in row 3.
NOTE: T3 will generate these files for you
Here's an example of a regular .csv file:
| Plant ID | Strain Name | Growth Phase | Planted Date |
|---|---|---|---|
| 1A4400000000123400001234 | Blue Dream | Vegetative | 2024-06-01 |
| 1A4400000000123400001235 | OG Kush | Flowering | 2024-06-02 |
| 1A4400000000123400001236 | Sour Diesel | Flowering | 2024-05-30 |
| 1A4400000000123400001237 | Green Crack | Flowering | 2024-06-03 |
Here's that same data in a .t3csv file:
| line in repeaterData | line in repeaterData | line in repeaterData | line in repeaterData |
| plantTag | strainName | growthPhaseName | plantedDate |
| Plant ID | Strain Name | Growth Phase | Planted Date |
| 1A4400000000123400001234 | Blue Dream | Vegetative | 2024-06-01 |
| 1A4400000000123400001235 | OG Kush | Flowering | 2024-06-02 |
| 1A4400000000123400001236 | Sour Diesel | Flowering | 2024-05-30 |
| 1A4400000000123400001237 | Green Crack | Flowering | 2024-06-03 |
Note that from row 3 and below, it's exactly the same as the .csv. The top two rows should never be modified.
T3 can automatically insert and upload photos, but it requires an additional step. The process is as follows:
- Prepare your photo files. Any photos you wish to upload should be placed inside a single folder.
-
Fill out your
.t3csv.. In a photo field (for example, ProductPhoto), enter the filename of the photo you wish to autofll. For example,blue_dream_01.png - Preload your photos. In the T3 Form Fill menu, select PRELOAD IMAGES, and select the folder that contains all the images.
-
Click AUTOFILL T3 CSV to Upload your
.t3csv. T3 will match the filenames to the prefilled photos, and automatically upload and select them in the Metrc form.
Watch a demo here
- Learn about other T3+ features
- Install the T3 Chrome Extension
- Start your free 30-day T3+ trial